
Your team, your rules. Create your own Roles, decide exactly what each one can see, and hand Quotes over cleanly when someone moves on.
Adding someone to your Quotient account has always been the quickest way to get more quotes out the door. But the hesitation we hear most often is about access: “I want them to create Quotes, but I’d rather they didn’t see the revenue figures on my Dashboard”.
Fair enough. So we’ve sorted it.
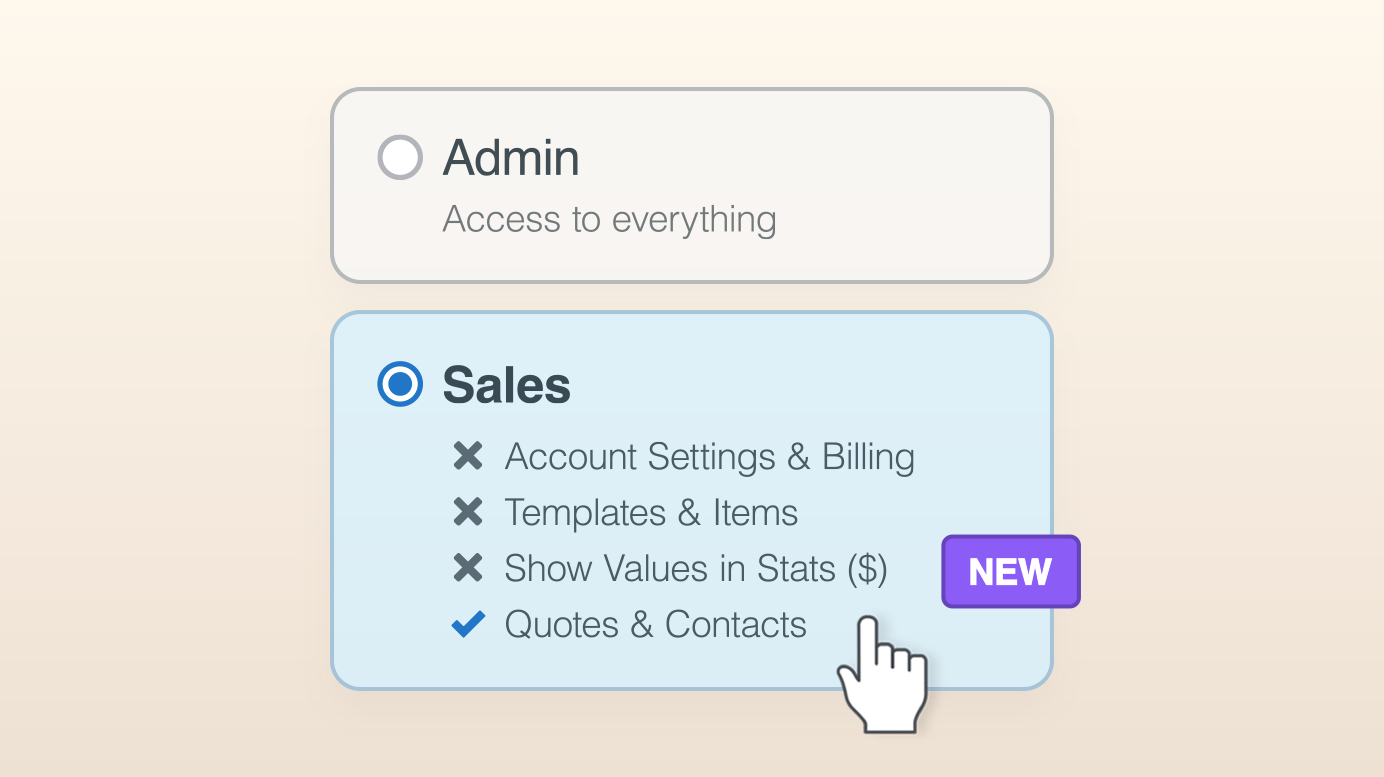
Create your own Team Member Roles
You can now create your own Roles and set the access permissions that suit each one. Sales, Estimating, Office, whatever your business actually looks like. There are two new permissions in the mix too: Templates & Items and Show Values in Stats.
The new Show Values in Stats permission is a big one. Your Dashboard Stats show revenue figures that are easy to misread if you don’t see the whole picture: wages, materials, insurance, and everything else that comes out the other side. Large sales numbers on a screen tells none of that story. Now you can simply leave it out of the conversation, and let your team get on with what they’re there for; quoting and closing deals!
Templates & Items works the same way. Your pricing library and templates took years to fine tune. Not everyone needs to be in there editing them.
You pick the Role when you invite someone, and you can change it at any time. Two Roles come ready to go: Admin has access to everything, and Sales is the limited one you can modify to suit, previously known as ‘Non-Admin’.
Nothing falls through the cracks when someone leaves your company
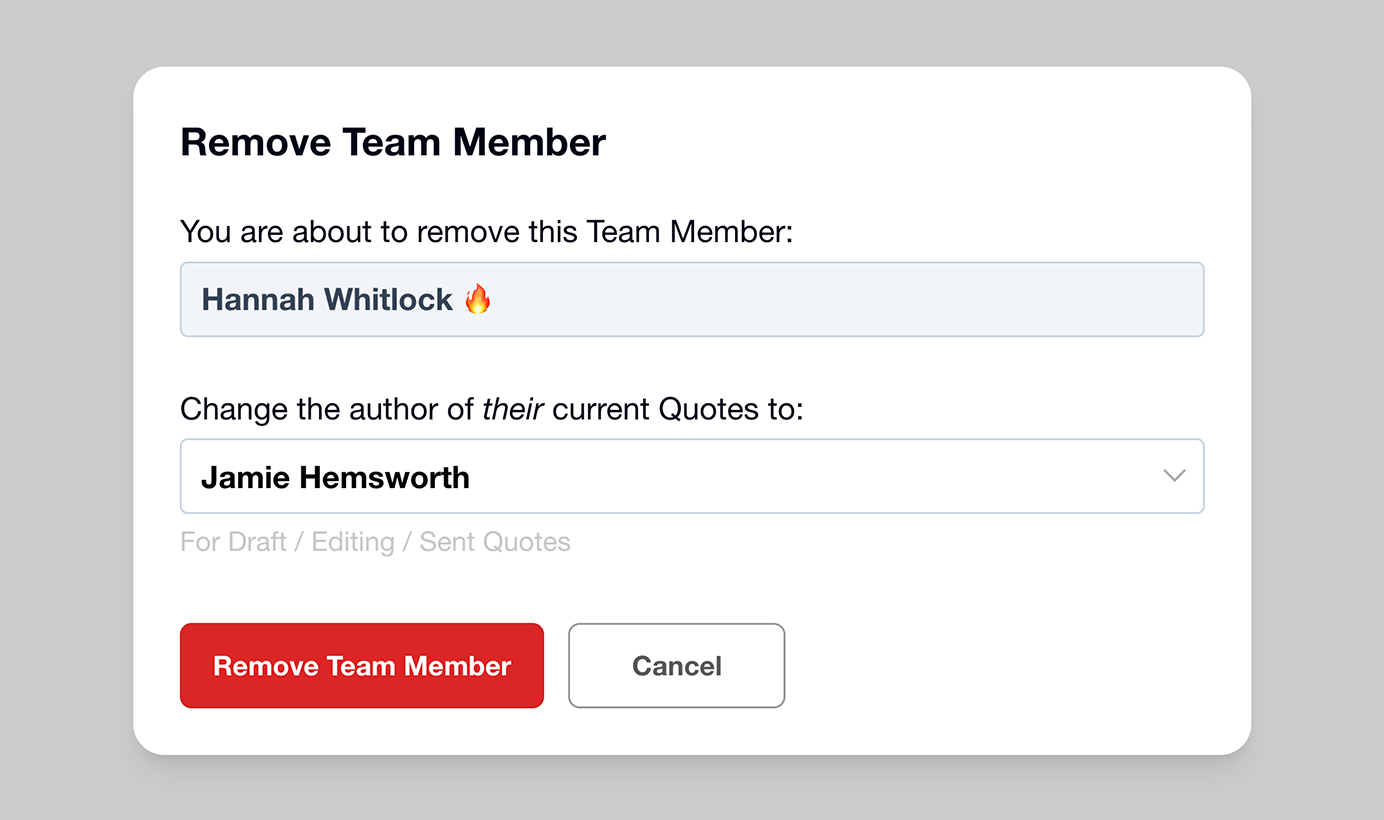
When you remove a Team Member from Quotient, you’re now stepped through changing the author of their current Quotes to another Team Member.
People move on. That part you can’t control. What you can control is what happens to all the Quotes they have in play.
Instead of quietly leaving those Quotes with someone who no longer has a login, you now pick who takes them over: Drafts, Quotes being edited, and Quotes already sent. From that moment on, acceptances, declines, follow-up reminders, and new questions from customers all land with the person who can actually do something about them.
No orphaned Quotes. No customer sitting there wondering why nobody replied.
The new Past Team Members filter
When browsing your Quotes, there’s now a Past Team Members filter.
Someone left eighteen months ago and a customer has just called about the job they quoted. Rather than scrolling and hoping, filter your Quotes by Past Team Members and it’s in front of you in seconds.
Everything they ever created stays in your account, exactly where it should be. It’s just easier to lay your hands on now.
Still flying solo?
If you’re on the Solo plan, this is a good moment to think about who else could be quoting for you. Quoting is often the thing that gets pushed to 9pm, and it’s rarely the best use of your evening.
Here’s what you get the moment there’s more than one of you:
- See who did what. Every Quote shows who created, sent, updated, and followed it up.
- Private Notes and mentions. Talk to each other behind the scenes on a Quote, tag someone in, and hand things over without the customer ever seeing it.
- Emails that come from the right name. Have Quote emails arrive from your company name, so customers see one consistent business no matter who did the quoting. Or keep it personal and send under each Team Member’s own name, with their own signature and contact details.
- ‘We / Me’ filtering. Focus on your own workload, then zoom out to the whole team when you want the full view.
- Separate, secure logins. No shared passwords, and access can be removed the day it needs to be.
- Notifications that go to the right person. The Team Member responsible for the Quote hears about it, and nobody else gets the noise.
Adding your second Team Member automatically moves you from the Solo plan to the Team plan, and your monthly billing updates from there. There’s nothing else to set up.
Head to Account Settings → Team Members to modify your Roles and send an invite. Your evenings will thank you.
For a full list of updates and smaller tweaks not covered here, check out the Release Notes.